 table of contents in Word represented by person using laptop." width="1080" height="675" />
table of contents in Word represented by person using laptop." width="1080" height="675" />
by Avantix Learning Team | Updated May 10, 2022
Applies to: Microsoft ® Word ® 2013, 2016, 2019, 2021 or 365 (Windows)
If you have created a custom or automatic table of contents (TOC) in a Word document, you can add heading levels to the TOC. You can add or edit levels using built-in heading styles or use custom styles as levels.
Do you want to learn more about Microsoft Word? Check out our virtual classroom or in-person classroom Word courses >
If you have created a table of contents using built-in heading styles (such as Heading 1, Heading 2, etc.), you can easily add heading levels.
To add built-in heading styles to a table of contents:
The Table of Contents dialog box appears as follows with 3 heading levels:
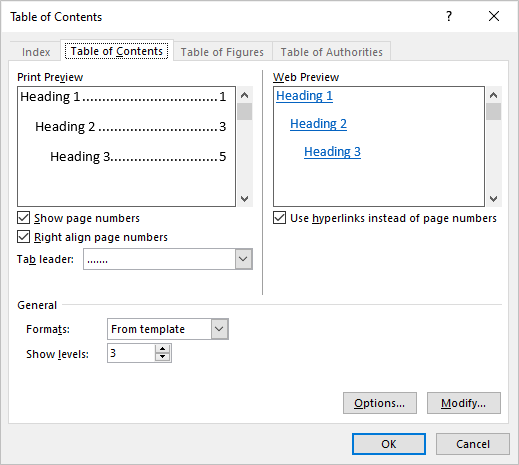 table of contents dialog box in Word with multiple heading levels." width="519" height="465" />
Although it's easier to use built-in heading styles to create a table of contents, you can use other styles (such as custom styles) in a table of contents.
To add other styles as levels to a table of contents:
In the following example, two custom styles are included in a table of contents:
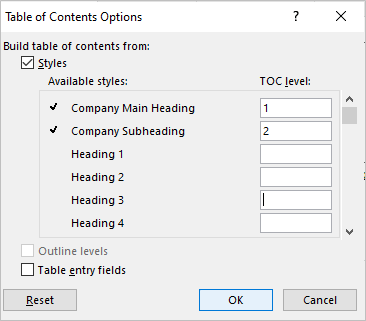 table of contents." width="366" height="321" />
You can continue to apply styles in your document and then right-click in the table of contents and select Update Field to update the table of contents. If you have used custom styles, you may need to go through the above process again to ensure that the correct styles are included in the updated table of contents.
Did you find this article helpful? If you would like to receive new articles, JOIN our email list.